Introduction
In this tutorial, we’ll walk through how to build a simple AI-powered app using Thunkable. This guide is ideal for beginner developers who are curious about AI and want a fun, visual way to explore app development.
A beginner-friendly tutorial for creating your first AI-powered app
In this tutorial, we’ll walk through how to build a simple AI-powered app using Thunkable. This guide is ideal for beginner developers who are curious about AI and want a fun, visual way to explore app development.
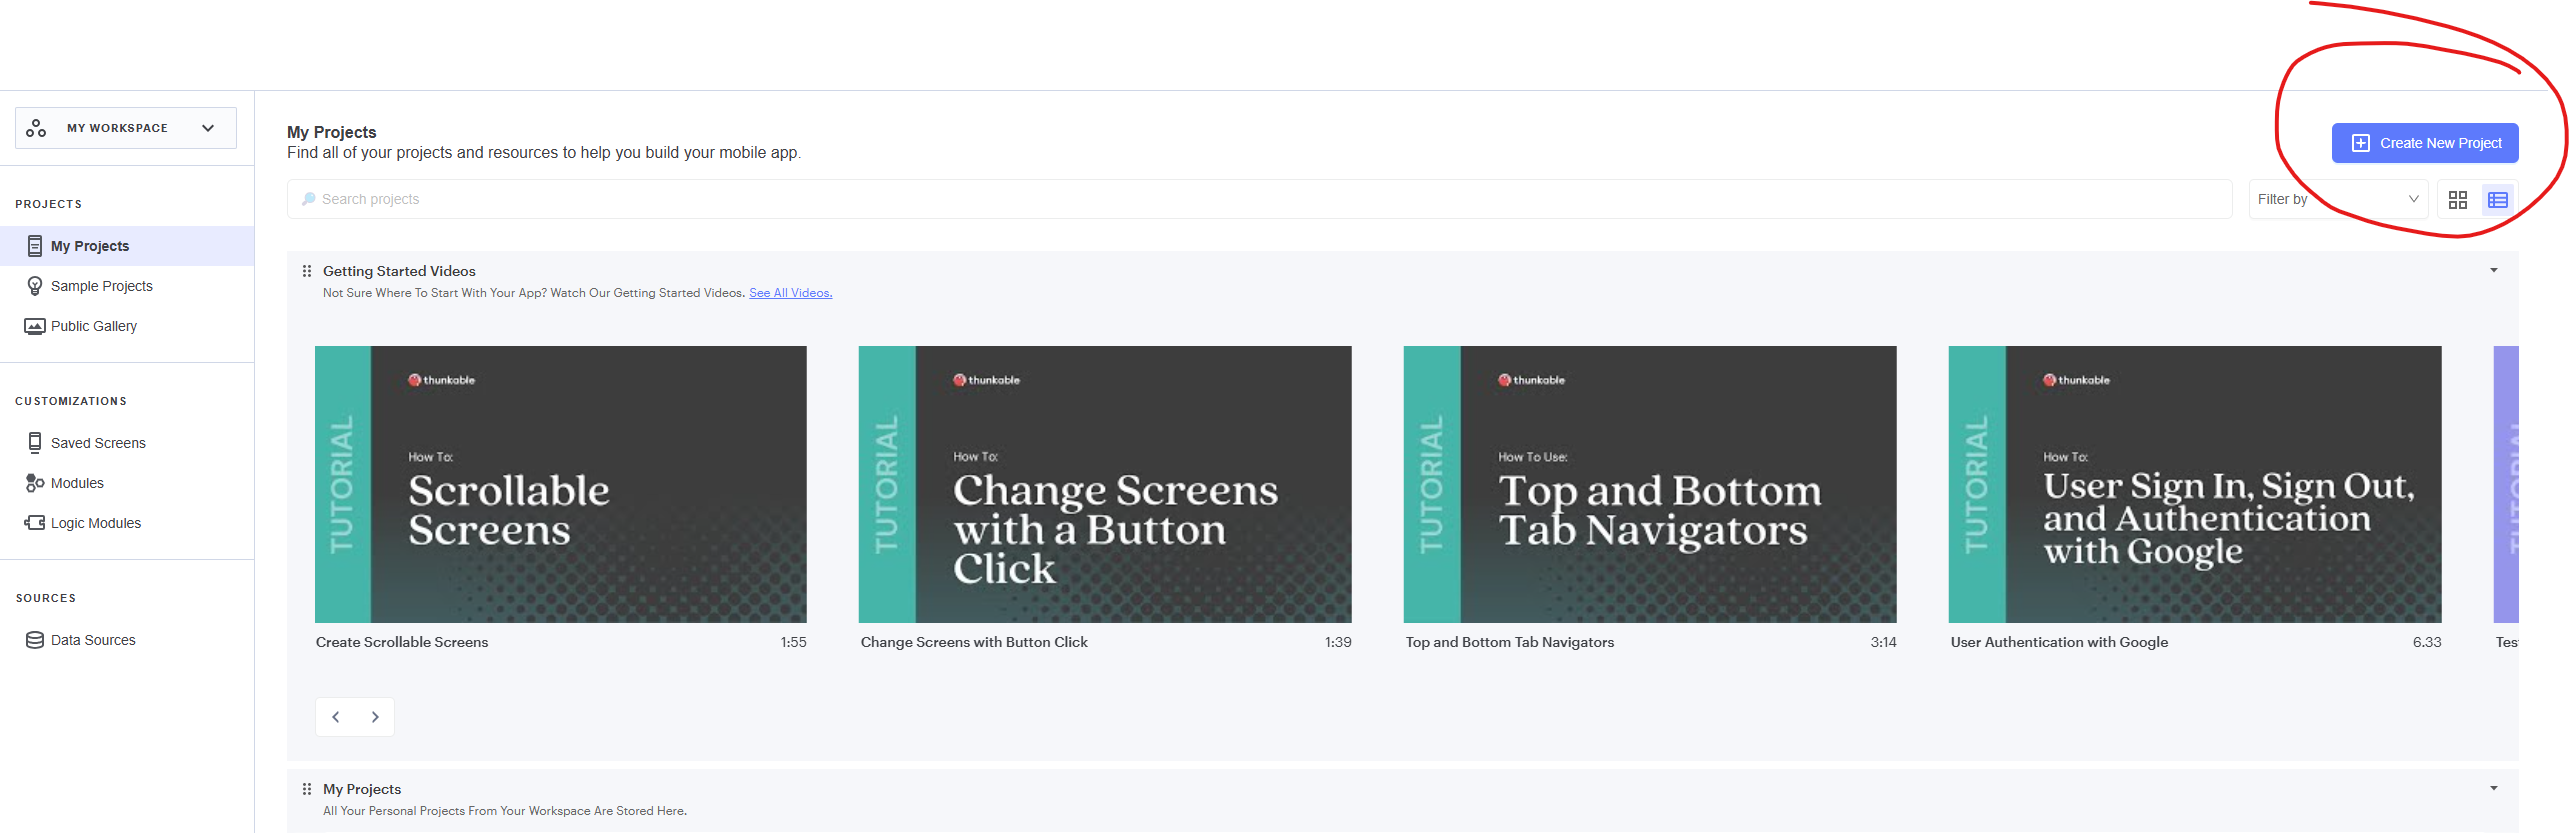
Head to Thunkable.com and log in or sign up. Once you're in the dashboard, click on “Create New App” and name it something like “AI Demo”.
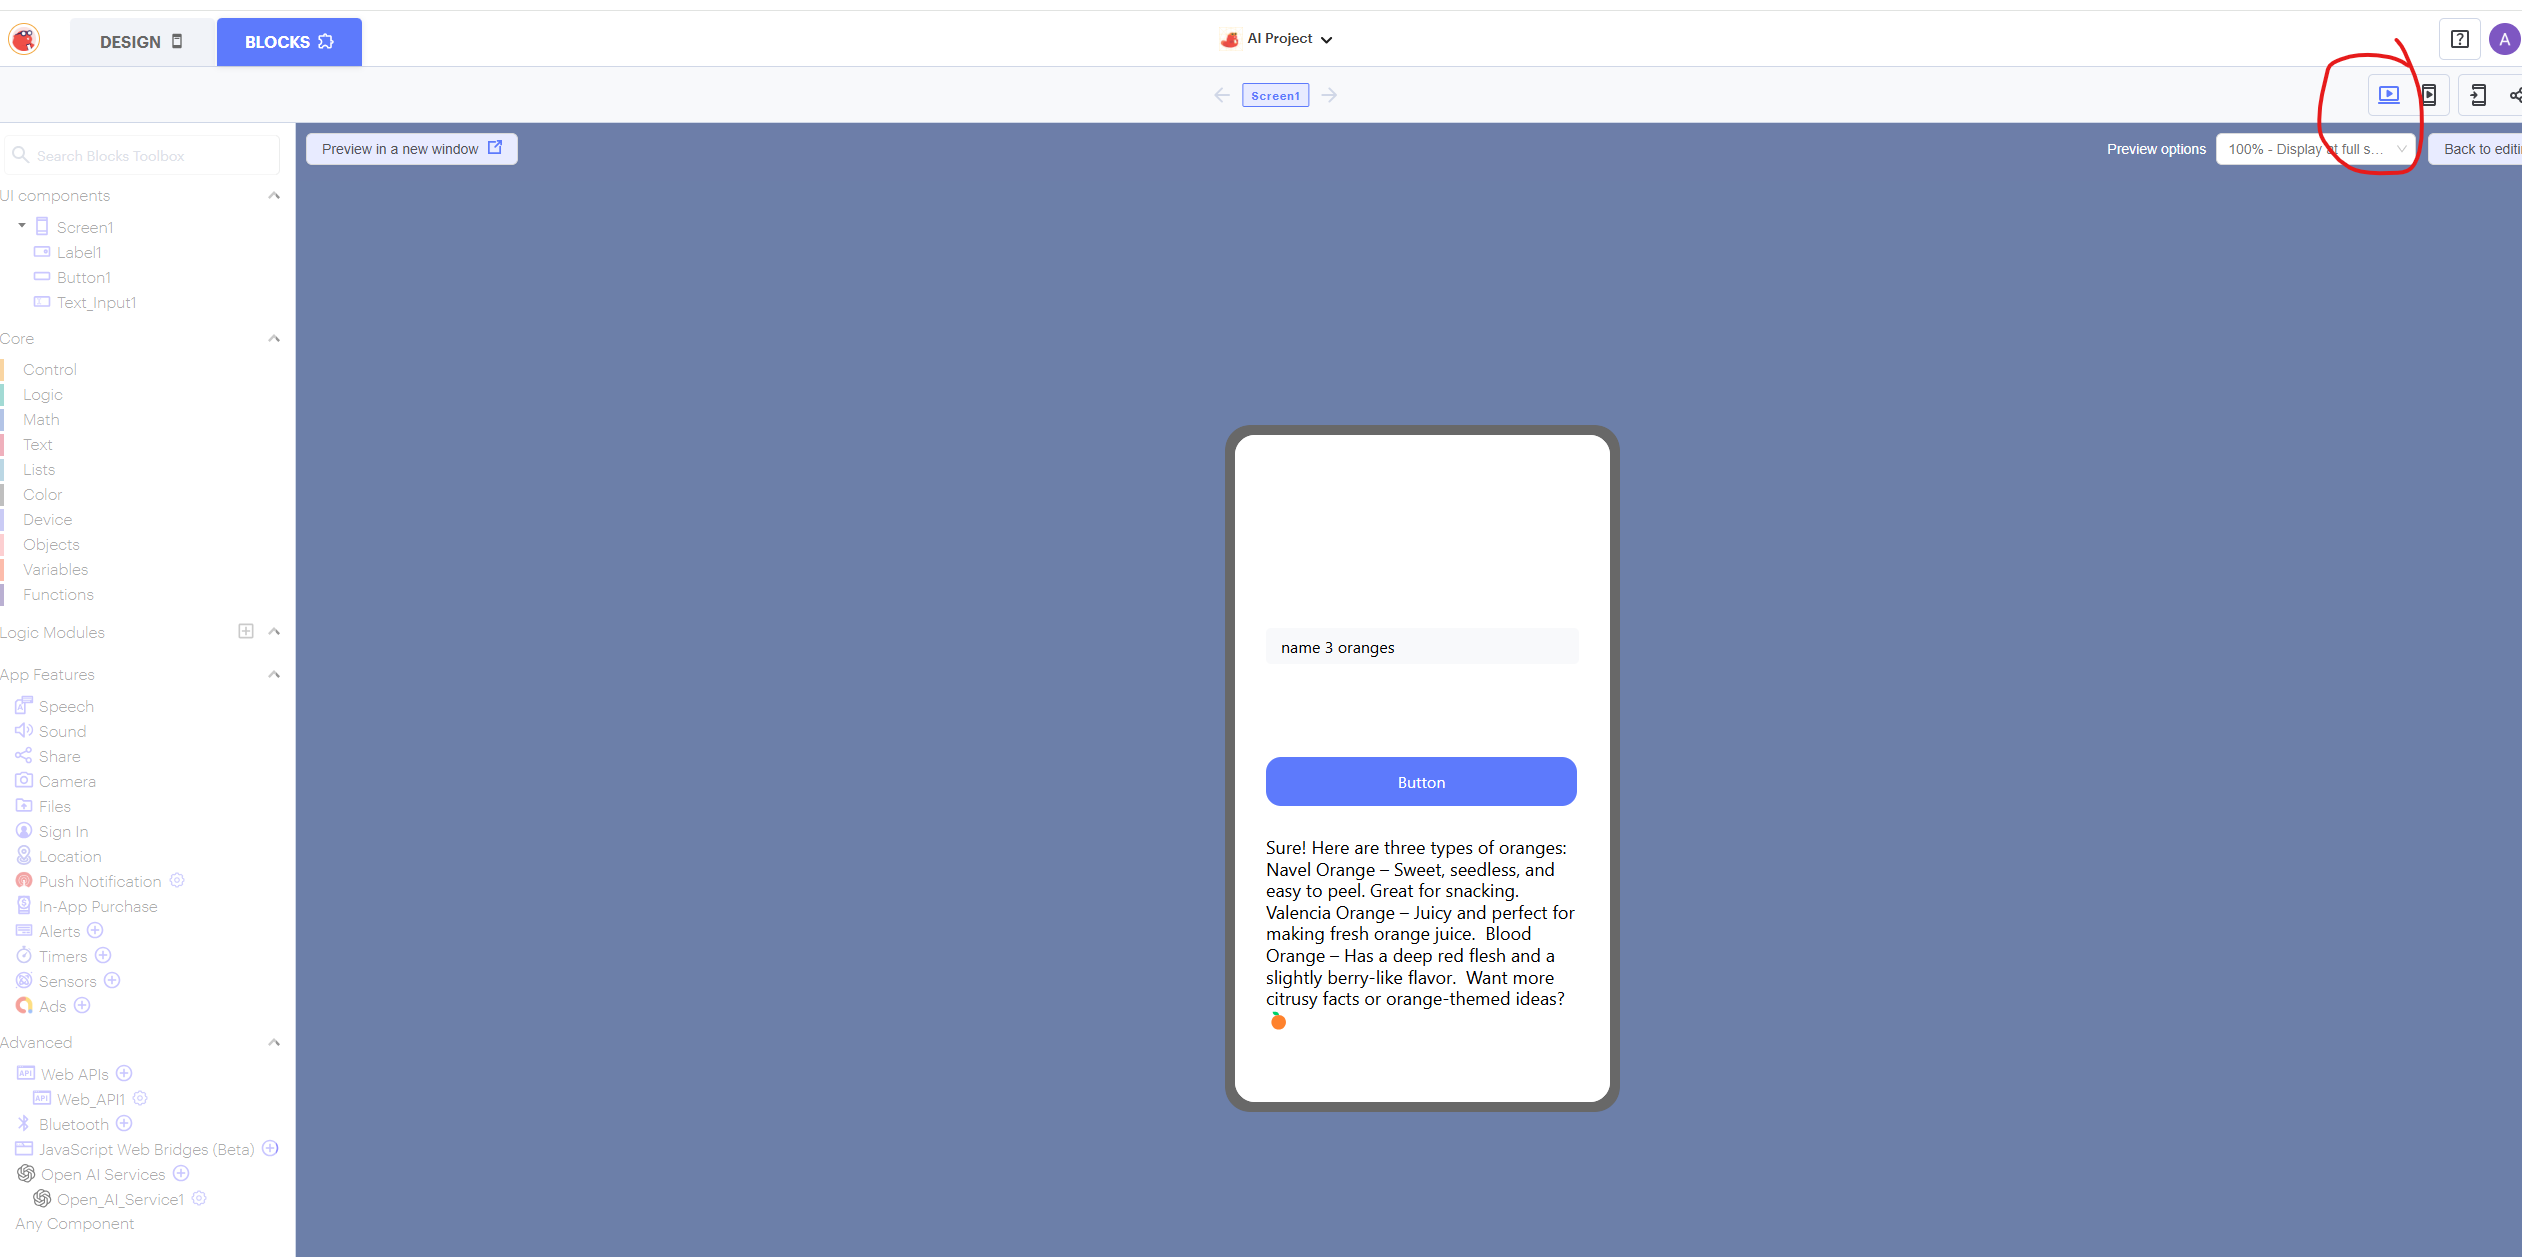
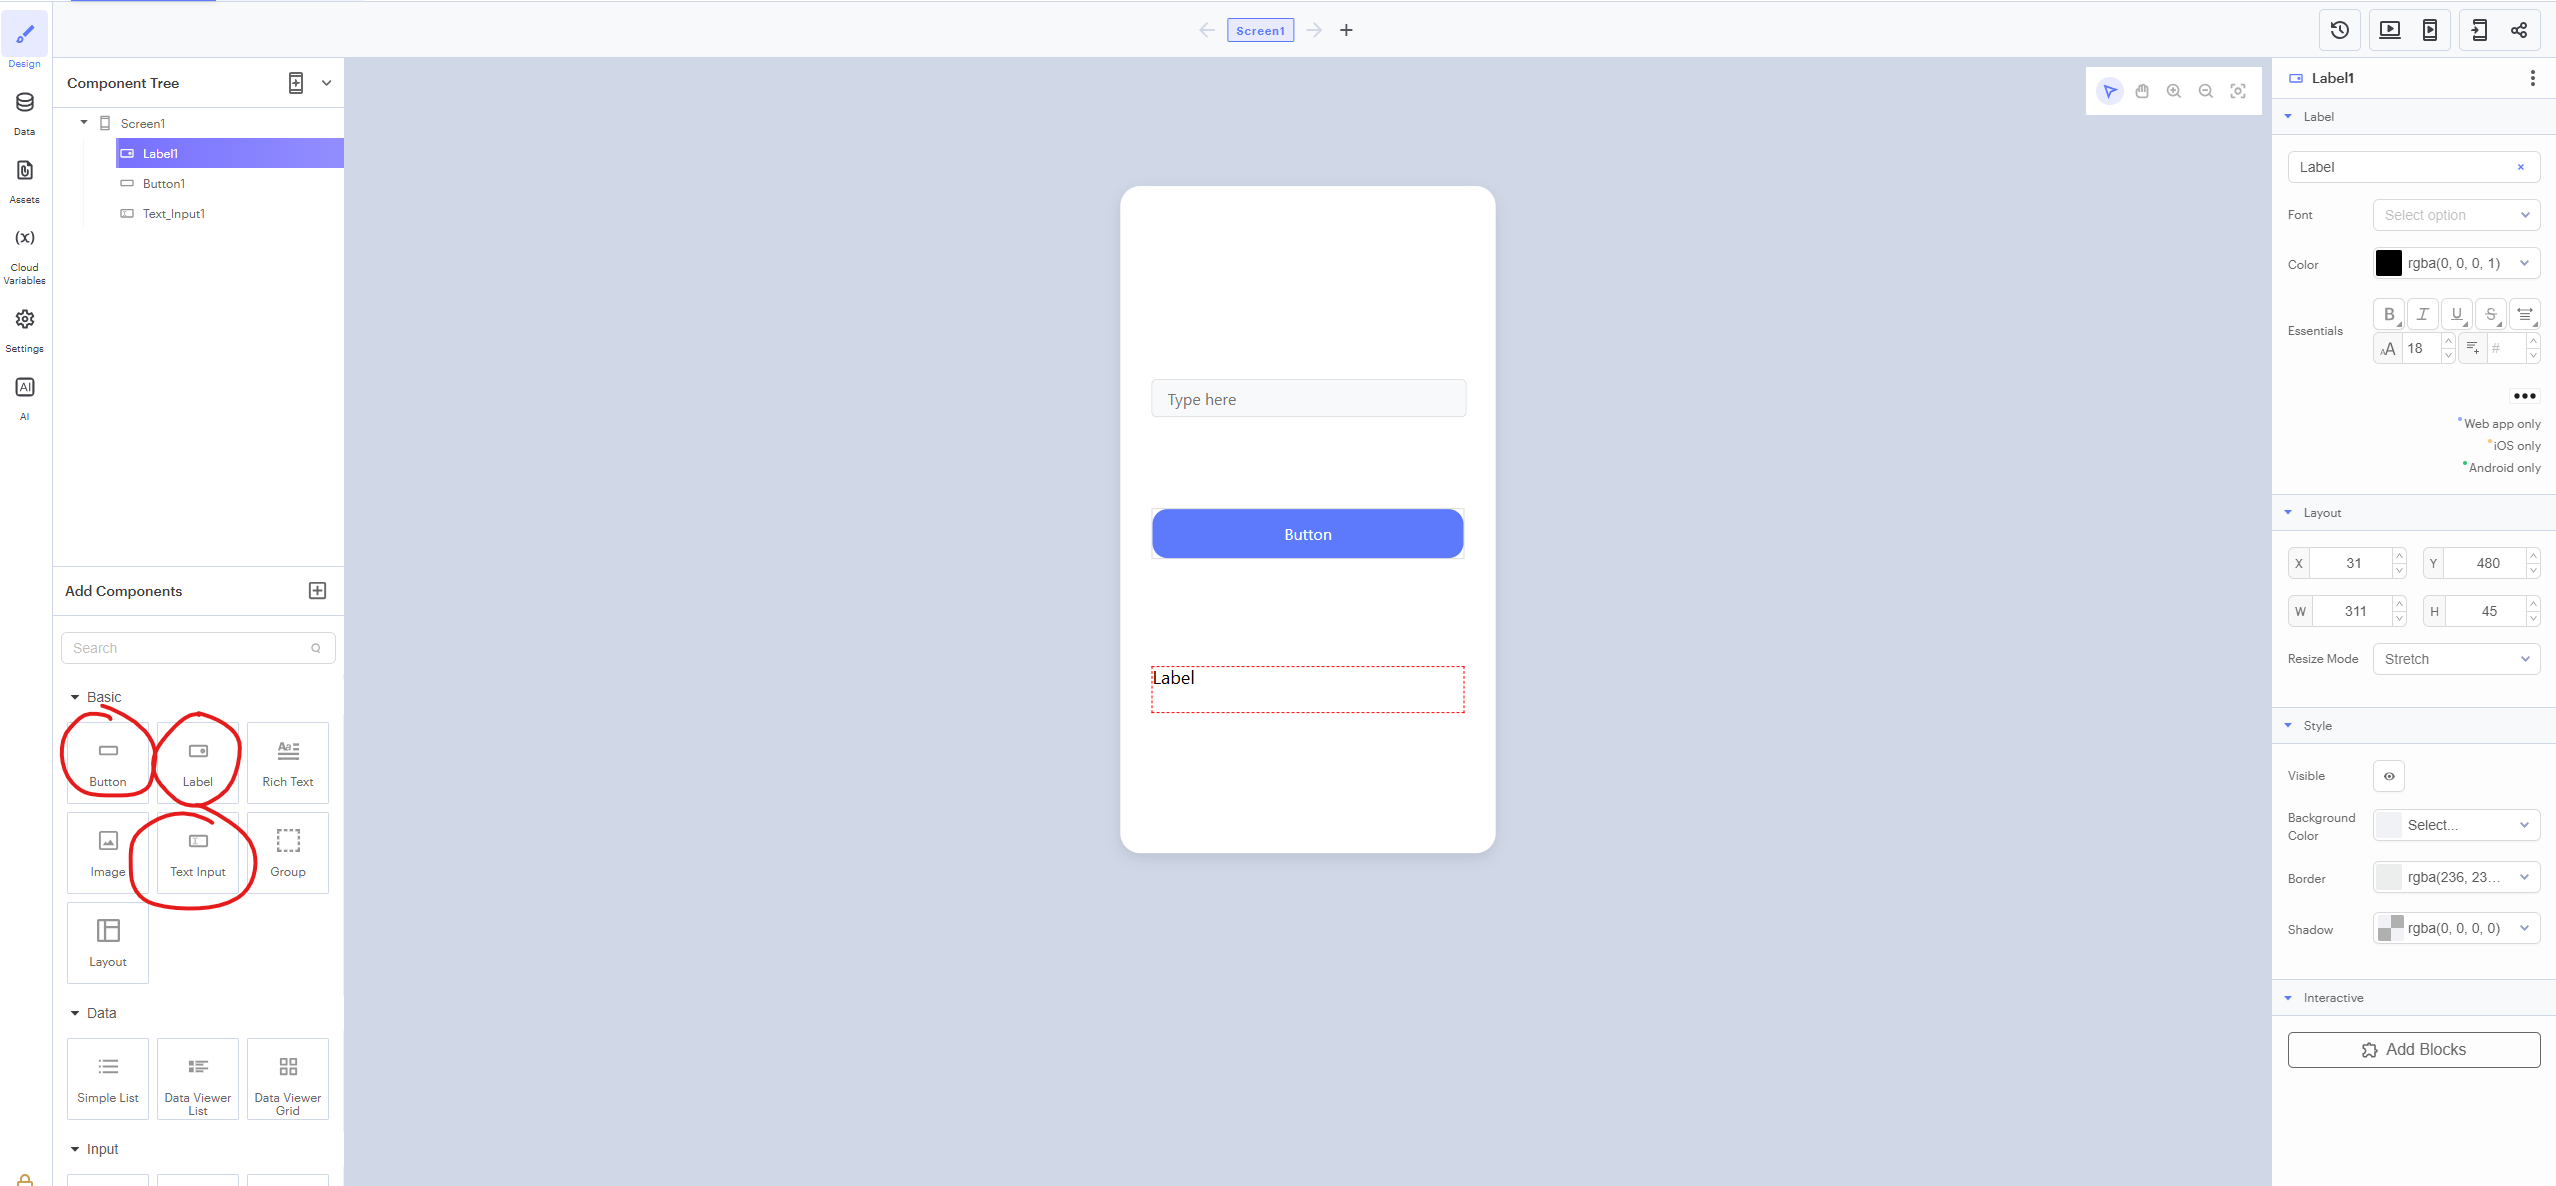
From the component panel, drag in a Text Input (for the user to type a question), a Button (to trigger the AI response) and a label (to display the Open AI response).
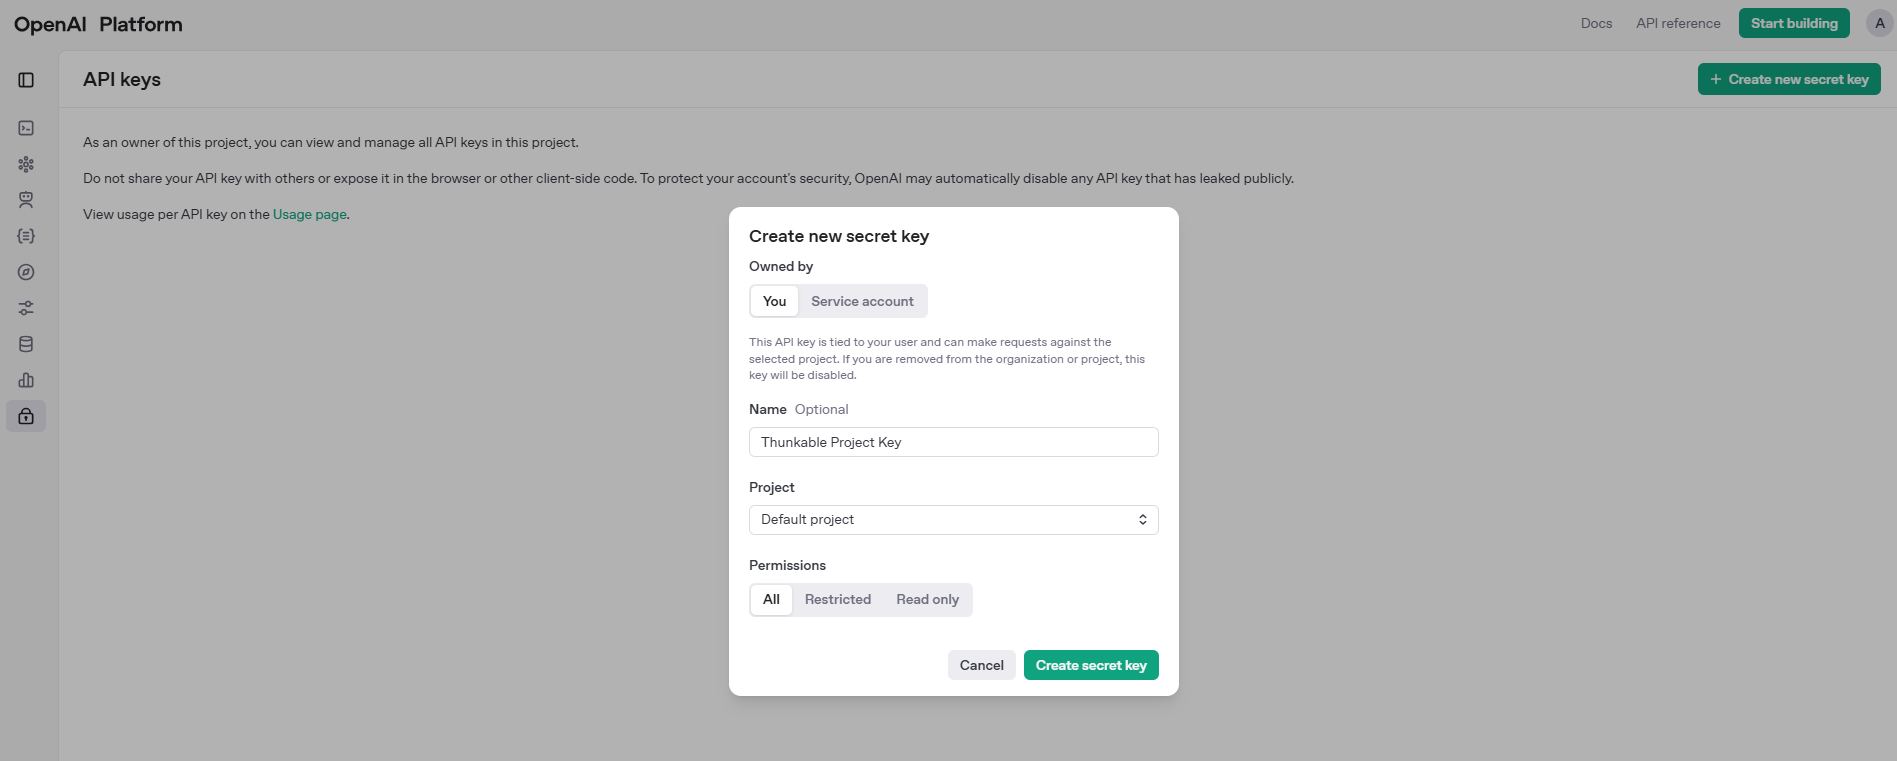
To integrate the AI capabilities into your Thunkable app, you’ll need an OpenAI API key. Here’s how to get one:
Note: Never share your API key publicly. Keep it secure to prevent unauthorized access to your OpenAI account.
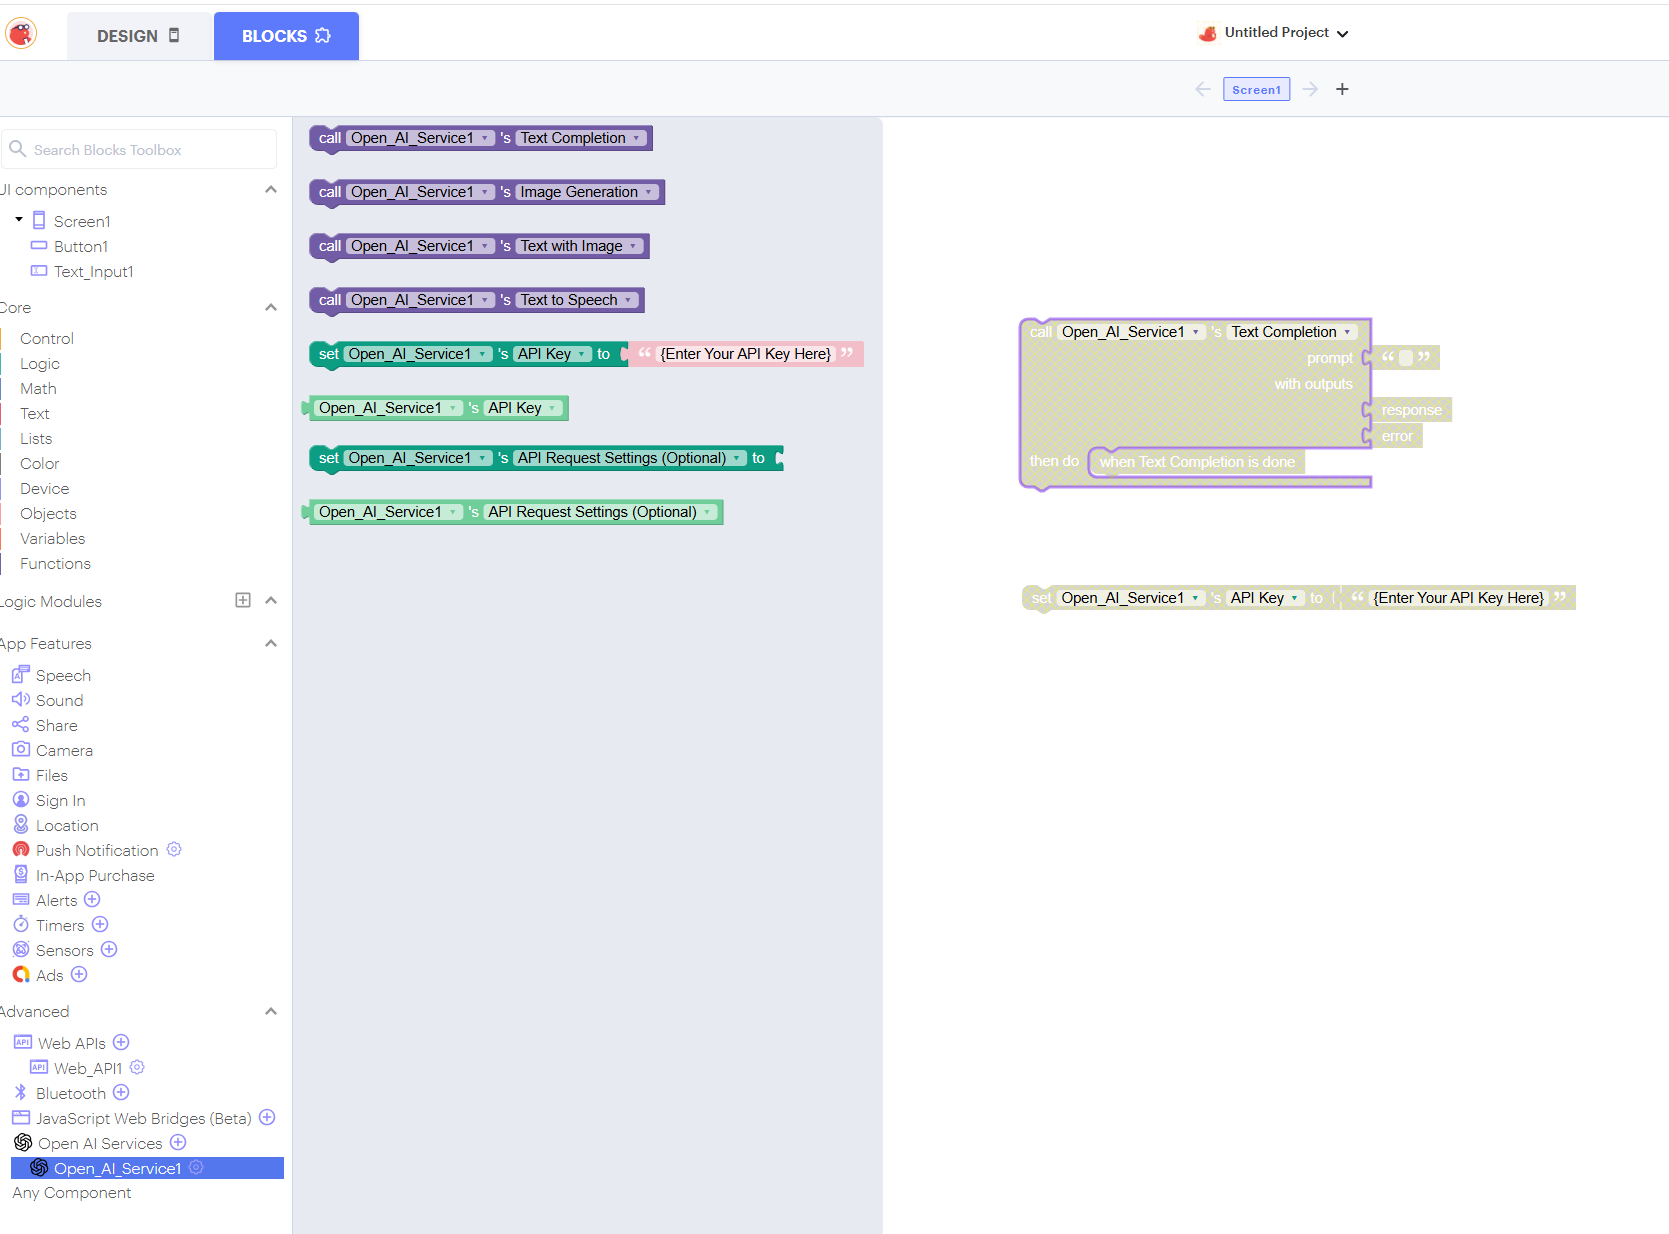
Thunkable offers an easy way to connect to OpenAI using its built-in OpenAI Services block. Here’s how to set it up:
OpenAI: Services component
Once the block is configured, it will automatically connect to OpenAI’s servers, send your request, and retrieve the AI’s response.
Using the Label component we will show the AI’s reply after the API call is complete. You can update the label’s text using the set Label.text to block.
when Button Click block from the Blocks tab.OpenAI: Set API Key block and the OpenAI: Get Completion block we added in the previous step.OpenAI: Get Completion block, set the Prompt input to the text from your Text Input component.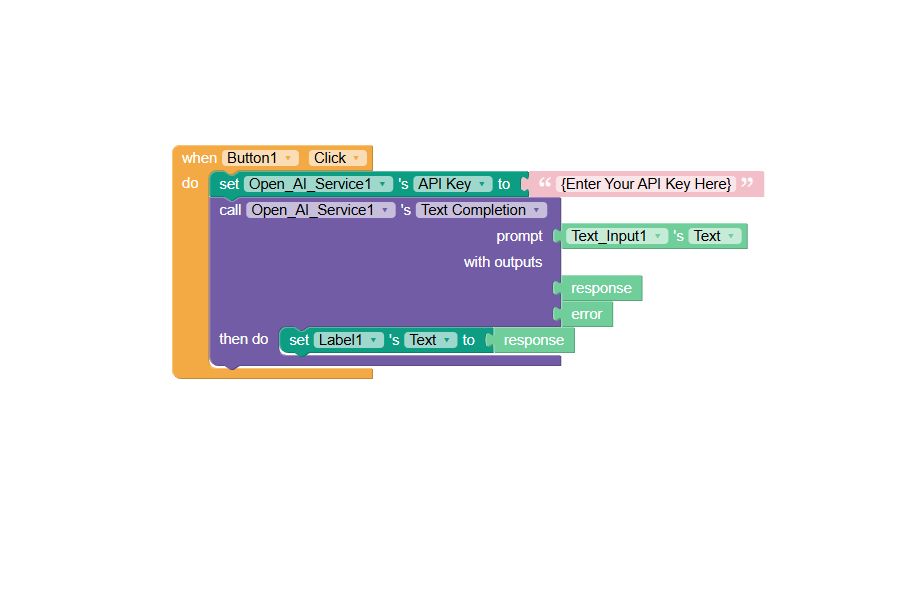
That’s it — you’ve just built your very own AI chatbot app in Thunkable! 🎉 You can test it out using the live test option within Thunkable to see how your app responds to different prompts.
Feeling adventurous? Try expanding your app by experimenting with new prompt styles, adding voice input for a hands-free experience, or even exploring image generation with AI.
As a challenge, see if you can add some basic error checking. Use an if/else block to display a helpful message if something goes wrong with the API response.