Introduction
In this tutorial, we will show you how to save your chat history in your Thunkable AI-powered app. By using Local Storage, you can store previous interactions and retrieve them when the app is reopened, making the app feel more dynamic.
Learn how to save and display previous chats using Local Storage in Thunkable
In this tutorial, we will show you how to save your chat history in your Thunkable AI-powered app. By using Local Storage, you can store previous interactions and retrieve them when the app is reopened, making the app feel more dynamic.
Open your existing Thunkable AI app (or create a new one if you're starting fresh). You will need:
Next, you’ll need to use Thunkable’s Local Storage ability to store the chat. Here’s how to do it:
Stored Variable is null, if so we'll set it to an empty list.
Now, let's implement the logic to save the chat history.
| this allows us to split it later if we want to.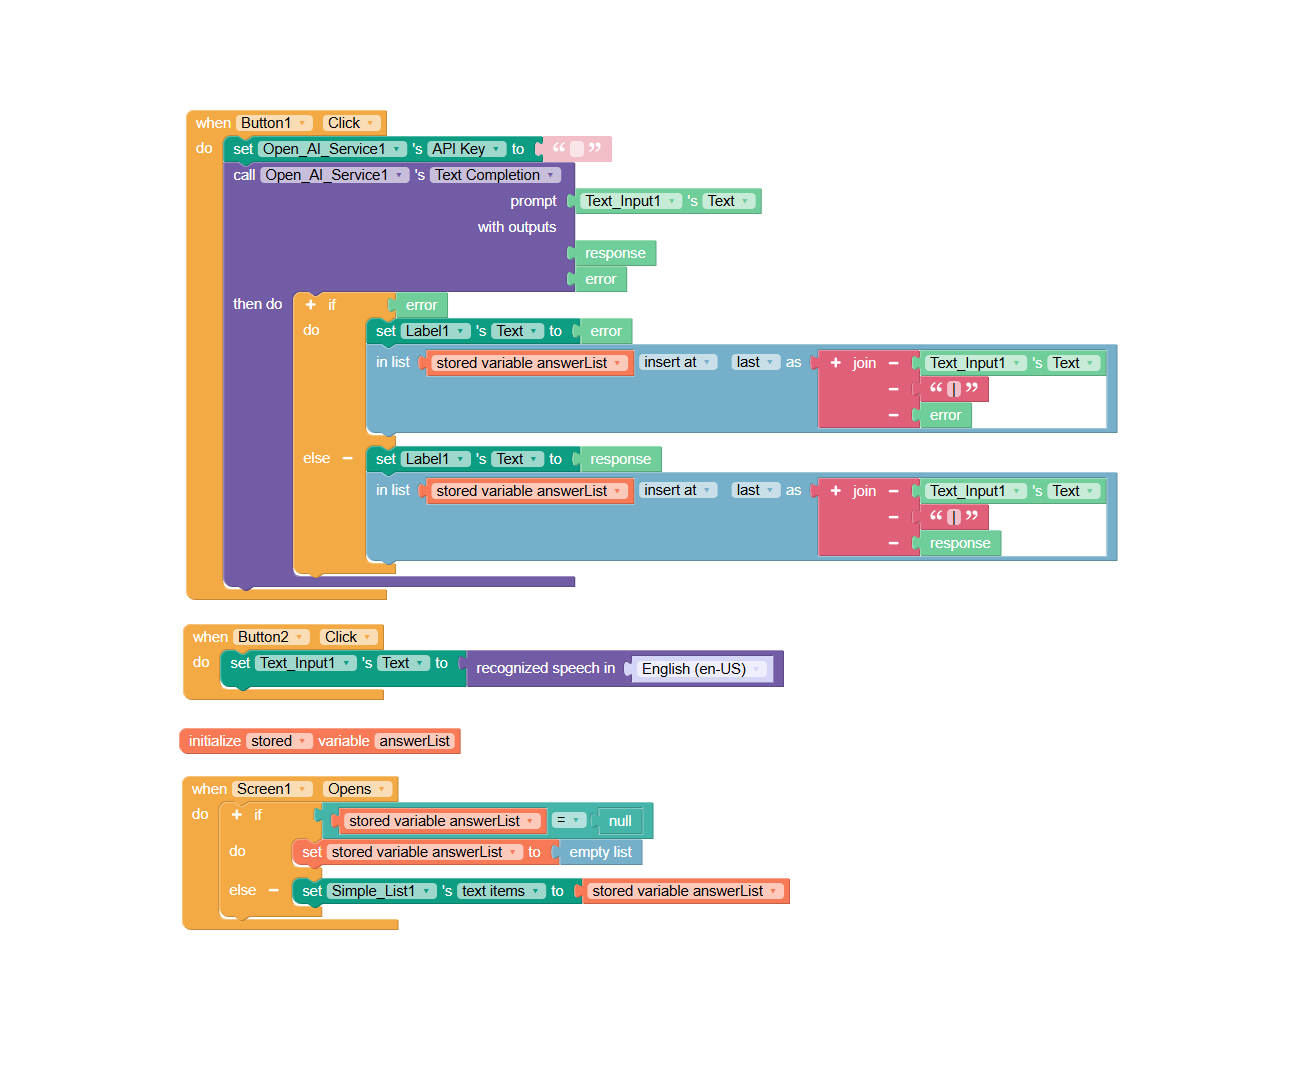
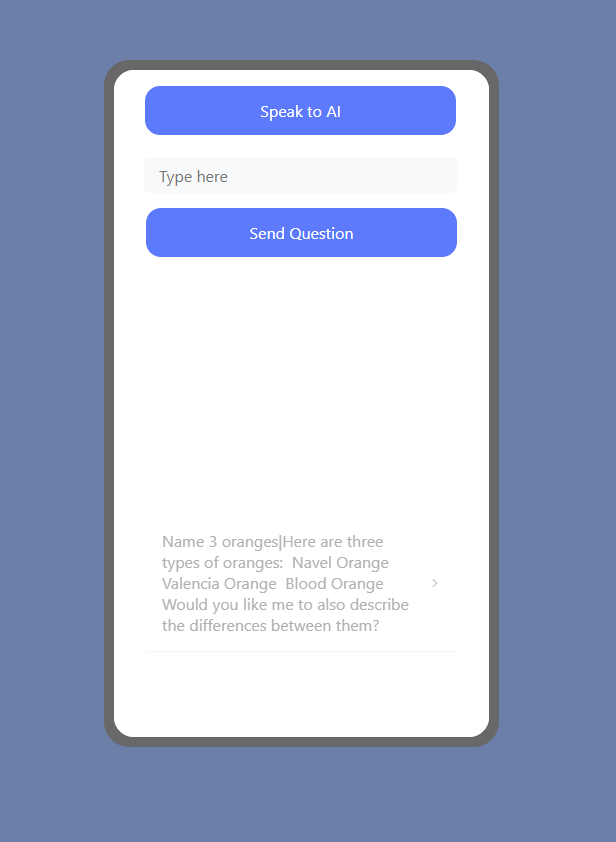
Now that you’ve added the chat history functionality, it’s time to test your app! Try entering a few queries, and check if the responses are saved and displayed correctly.
You can enhance this feature by allowing users to delete their chat history or add timestamps to each message.